We have a new bilingual glossary of Printmaking techniques that members Beth Shepherd and Madeleine Rousseau have worked hard to put together. In conjunction with the glossary, they also created a large poster that will be installed at the OGPC Gallery at the Nepean Creative Arts Centre.
Want to learn more about what does linocut or etching mean? OR what are all the different kinds of traditional printmaking types? Visit our webpage The Art of Print – Printmaking Techniques !
Un nouveau glossaire bilingue des techniques des arts imprimés est maintenant disponible. Ce projet a été piloté laborieusement par Beth Shepherd et Madeleine Rousseau, deux membres du CAGOG. De plus, elles ont créé une grande affiche qui vulgarise les techniques des arts imprimés. Cette affiche sera placée dans la Galerie du CAGOG située dans le Centre des arts créatifs de Nepean.
Vous voulez en savoir plus sur ce qu’est la linogravure ou l’eau-forte ? Ou quelles sont les différentes techniques d’arts imprimés traditionnelles ? Visitez notre page web L’art de l’estampe- Techniques des arts imprimés!
We live in a world where images can be mass reproduced without end. We can trace this history back to the printing press through to the industrial revolution. In response to the growing mass production of printed images, visual artists in the late 19th century revived the creation of the handmade drypoint.
Artists used a stylus to scratch lines directly into a soft metal plate, typically copper. A delicate burr would be raised from the plate. Both the incised line and the burr will hold ink when the plate is wiped. It is this highly coveted burr that creates the velvety soft lines and plate tone that is sought by visual artists using drypoint.
Today, the traditional drypoint technique is still popular with artists. In the last few years, there has been an explosion in experimentation with different surfaces and tools. Dentistry tools, nails and power drills can be used to create lines and textures on various types of flat matrices, such as PVC, plexiglass, PETG packaging plastic and even flattened Tetra packs and plywood. As a result of such experimentation, drypoint and printmaking in general are now more accessible to new and established visual artists.
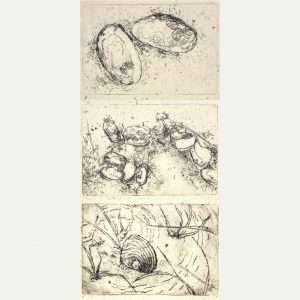
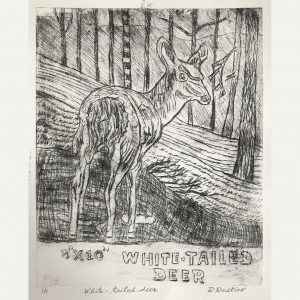
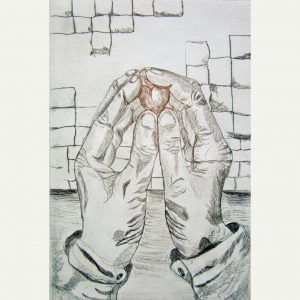
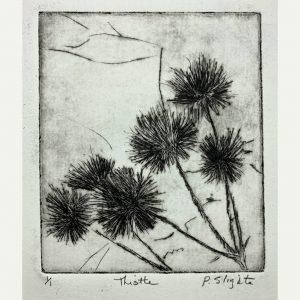
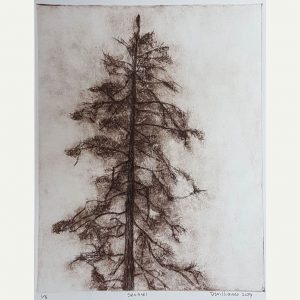
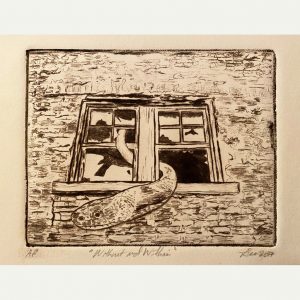
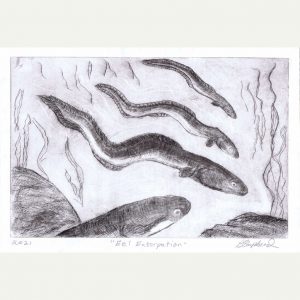
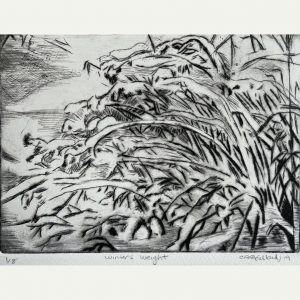
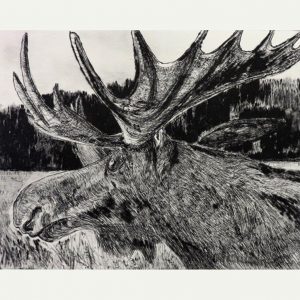
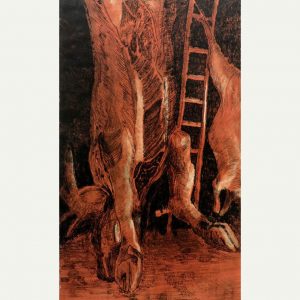
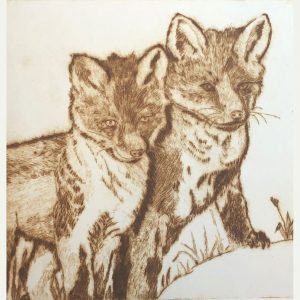
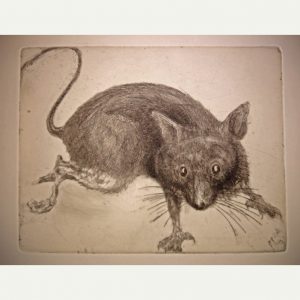
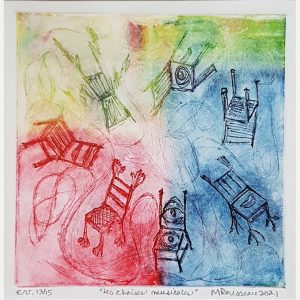
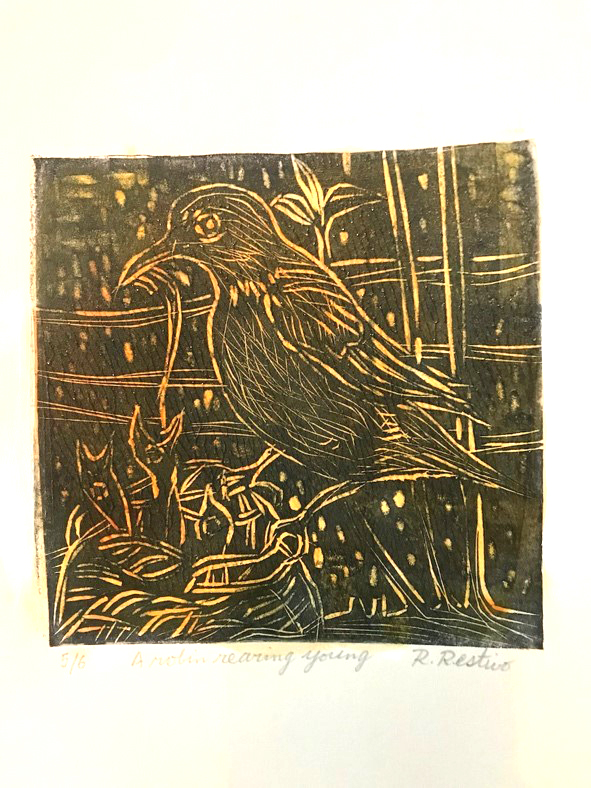
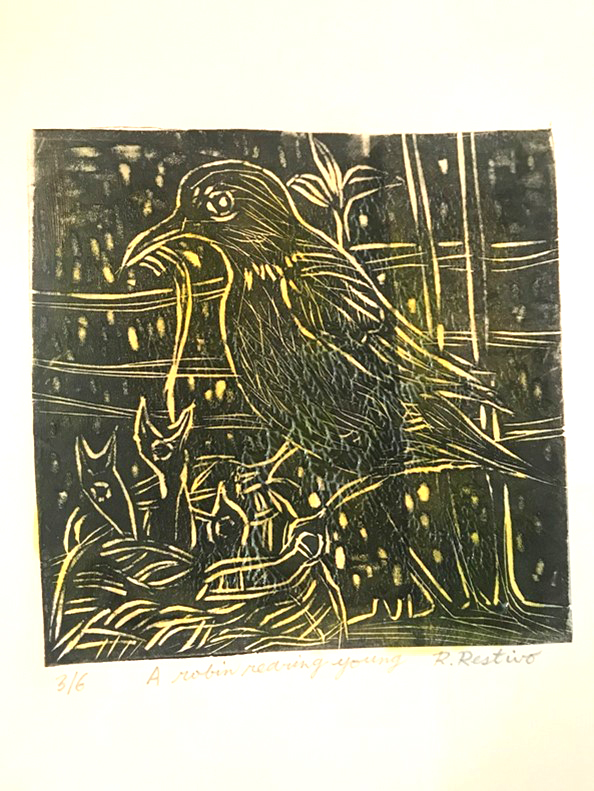
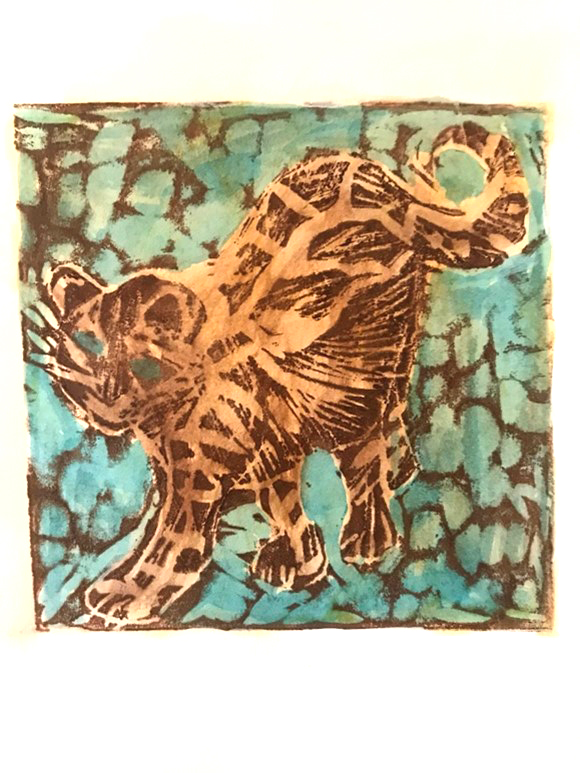
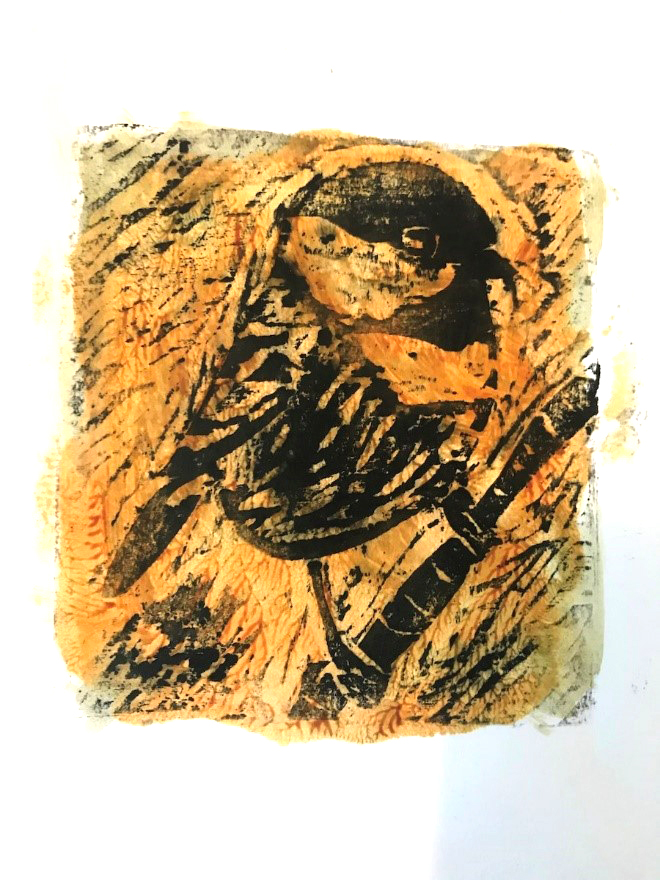
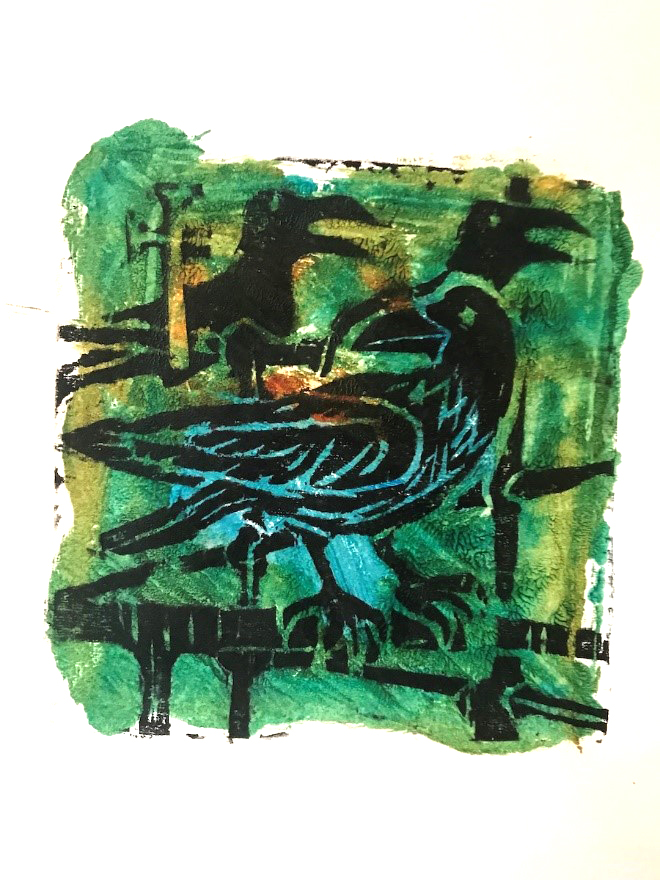
Our current show “Feel the Burr” features a full range of works featuring drypoint, from simple line drawings to works demonstrating a variety of mark making and values shaping the form. While drypoints traditionally are dark ink on white paper, we showcase works that incorporate colour, through the use of coloured inks, multiple plates or the application of coloured paper in a manner know as chine-collé. Because the burr on the plate can quickly break down under the weight of the press, editions are usually very small. Many of the pieces in Feel the Burr are unique prints.
Nous vivons dans un monde où les images peuvent être reproduites en masse sans fin. Nous pouvons retracer cette histoire à l’invention de l’imprimerie jusqu’à la révolution industrielle. En réponse à la production de masse croissante des images imprimées, les artistes visuels à la fin du 19ème siècle ont relancé la création de la pointe sèche faite à la main.
Les artistes utilisaient un stylet pour rayer les lignes directement dans une matrice de métal tendre, généralement du cuivre. Une fine bavure, ou barbe, serait soulevée de la matrice. La ligne incisée et la barbe retiendront l’encre lorsque la matrice est essuyée. C’est cette barbe très convoitée qui crée les lignes douces et veloutées et la tonalité de la plaque recherchées par les artistes visuels utilisant la pointe sèche.
Aujourd’hui, la technique traditionnelle des pointes sèches est toujours populaire auprès des artistes. Au cours des dernières années, il y a eu une explosion d’expérimentation avec différentes matrices et différents outils. Des outils de dentisterie, des clous et des perceuses électriques peuvent être utilisés pour créer des lignes creux? et des textures sur différents types de matrices plates, comme le PVC, le plexiglas, le plastique d’emballage PETG et même les emballages Tetra aplatis et le contreplaqué. À la suite de ces expériences, la création à la pointe sèche et les arts imprimés en général sont maintenant plus accessibles aux artistes visuels émergents et établis.
Notre exposition actuelle «Touchez les barbes!» présente une gamme complète d’œuvres créées avec la technique de la pointe sèche, allant de simples dessins linéaires à des œuvres déployant une variété de marques et de tonalités? qui façonnent la forme. Alors que les œuvres à la pointe sèche sont traditionnellement réalisées avecde l’encre foncée sur papier blanc, nous présentons des œuvres qui incorporent la couleur, par l’utilisation d’encres colorées, de plaques multiples ou l’application de papier coloré d’une manière appelée chine collé. Parce que la barbe sur la plaque peut rapidement se décomposer sous le poids de la presse, les tirages? sont généralement très petits. Un bon nombre des estampes de «Touchez les barbes!» sont des mono impressions.
Exhibiting Artists (not in order of appearance) / Les artists exposants (pas dans l’ordre d’apparition): Luigina Baratto, Cheryl Beillard, Susan MW Cartwright, Murray Dineen, Carol Howard Donati, Leonard Gerbrandt, Denise Lachance, Aileen Leo, Shealagh Pope, Rod Restivo, Madeleine Rousseau, Beth Shepherd, Patricia Slighte, Dale Shutt, Moira Toomey, and/ et Doug Williams.
Click on the artwork to have more information and see a close-up view./ Cliquez sur l’œuvre d’art pour avoir plus d’informations et voir un gros plan.
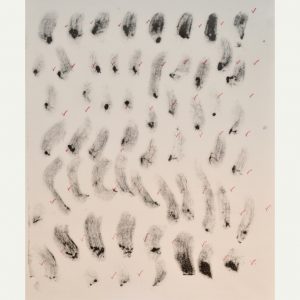
Traditionally, encaustic printmaking made use of coloured beeswax heated on an aluminum sheet placed on a hotplate in order to make an image. Printmakers can provide a sort of encaustic finish look to their prints with the following procedures I experimented with. This will produce a monoprint.
The following procedures using acrylic mediums can recreate this encaustic wax appearance. It should be noted at the outset that use will be made of Golden Open acrylics and mediums that remain moist for an extended time and are thus suitable for monoprinting. They can be mixed with Golden heavy body acrylics and mediums if one wants to speed up the drying time.
1) The most straight-forward approach will be to use Golden heavy gel (matte) mixed with Golden Open acrylic medium (gloss) in a ratio of 1:3, respectively. As noted above, the monoprint technique that is to follow uses Golden Open acrylic medium since the heavy gel on its own would dry too quickly.
The back of a clear acrylic plate will have an outline of the print image traced onto it. The above-mentioned mediums are brushed onto the top of this acrylic plate using a bristle brush or scraped on with a plastic palette knife. The mediums should be applied in a thin layer. A second layer can always be added after the print has partially dried.
To give a wax-like appearance, a few drops of Golden fluid acrylic quinacridone/nickel azo gold is applied and mixed with the mediums. Other modern acrylics can also be added such as phthalo blue (green shade), indian yellow hue (quinacridone/nickel azo yellow/arylide yellow) or naphthol red light (see examples in photos) .
For registration purposes, the acrylic plate coated with mediums can be laid on top of the print. The mediums are transferred onto the print using hand pressure. The print and the acrylic plate can be turned over, so that the print lies on top of the acrylic plate and further hand pressure or hand burnishers can be applied.
2) Alternatively, to create a yellow acrylic wax-like appearance, add a couple of drops of Golden fluid Hansa yellow medium and quinacridone/nickel azo gold to Golden soft gel (semi-gloss) with a few drops of Golden acrylic glazing liquid (gloss). This gives a wax-like surface with the viscosity of yogurt and the colour of warm liquid beeswax. The transfer process is the same as the original method.
3) The best procedure for acrylic encaustic printmaking is to thinly brush (or scrape with a plastic palette or a small strip of plexiglass) Golden Open acrylic gel (matte) onto a clear acrylic sheet. You may add 4 drops of Open acrylic medium (gloss) in order to create a mixture of gloss and matte finish. Add 4 drops of Golden fluid Indian yellow hue and 3 drops of quinacridone/nickel azo gold and mix the mediums and acrylics. The printing process is the same as the original.
Here are examples of acrylic encaustic printmaking showing prints with different colors of the medium-gel mix.