Why would you want to pre-mix a green hue and store it in a tube? Is it not easier to just mix yellow and blue on your palette and hope for the best? However, if you want a consistent green that is pre-mixed according to a fixed formula, having a tube ready to go is very handy when you are in a hurry and you need to focus on mixing other colours.
I often wondered, why, in oil painting, every brand has a Permanent Green Light until I bought a tube and realized how handy it is to have a consistent green that I can easily lighten or darken according to need. A little more blue will turn it into permanent green medium while more yellow will give you various shades of apple green.
Apparently, there is no reason to call the colour “Permanent green”; it just started that way and no one knows why. It has nothing to do with the permanence or lightfastness of the pigments. In fact, in the case of printing inks, the yellow that is used is mostly PY3, or Hansa yellow which is listed as moderately lightfast.
For the purpose of this mixture, we will use Process yellow and Process blue from Calego Safe Wash ink. This Process yellow is listed as PY3, or Hansa yellow, a Monoazo, also called Arylide yellow. The masstone is a bright lemon yellow with a slightly greenish undertone. It is semi-transparent. It is best to avoid the Diarylide yellow as the undertone has a reddish tint. Hansa yellow is a synthetic organic pigment. Organic yellow pigments tend to be less lightfast than non-organic pigments such as the cadmium yellows. The Process blue used in the mixture is phthalocyanine blue or PB15:3, which has a deep blue in mass tone with a greenish blue in shades. The phthalocyanine family of pigments has good lightfastness, but dulls over considerable time.
So here’s an easy way to make a tube of your own permanent green. In the post Transfering ink we saw how easy it is to fill an empty tube with ink.
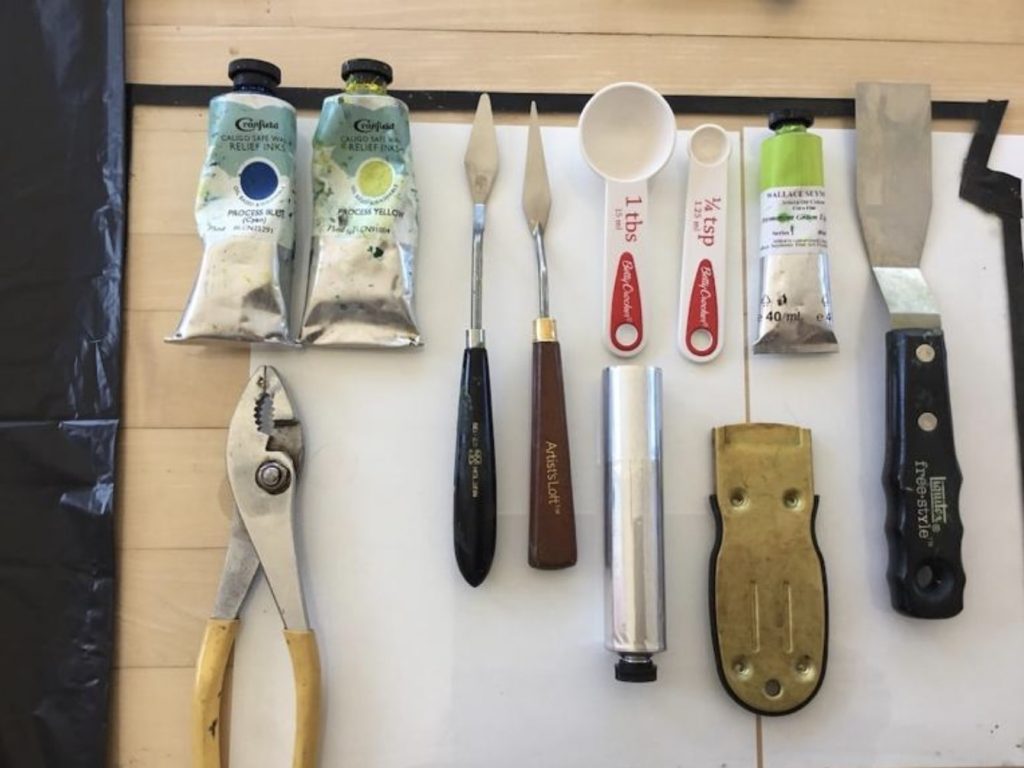
Fig. 1
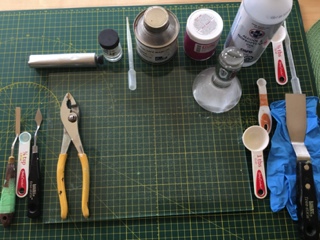
So let’s start … you will need (Fig. 1) :
One tube of process yellow
One tube of process blue
A glass plate
A large palette knife
A small palette knife
One tablespoon (for use with the yellow)
One 1/8 teaspoon (or 1/4 tsp for the blue if you wish to double the recipe)
One 37 ml tube
A pair of pliers
Recipe:
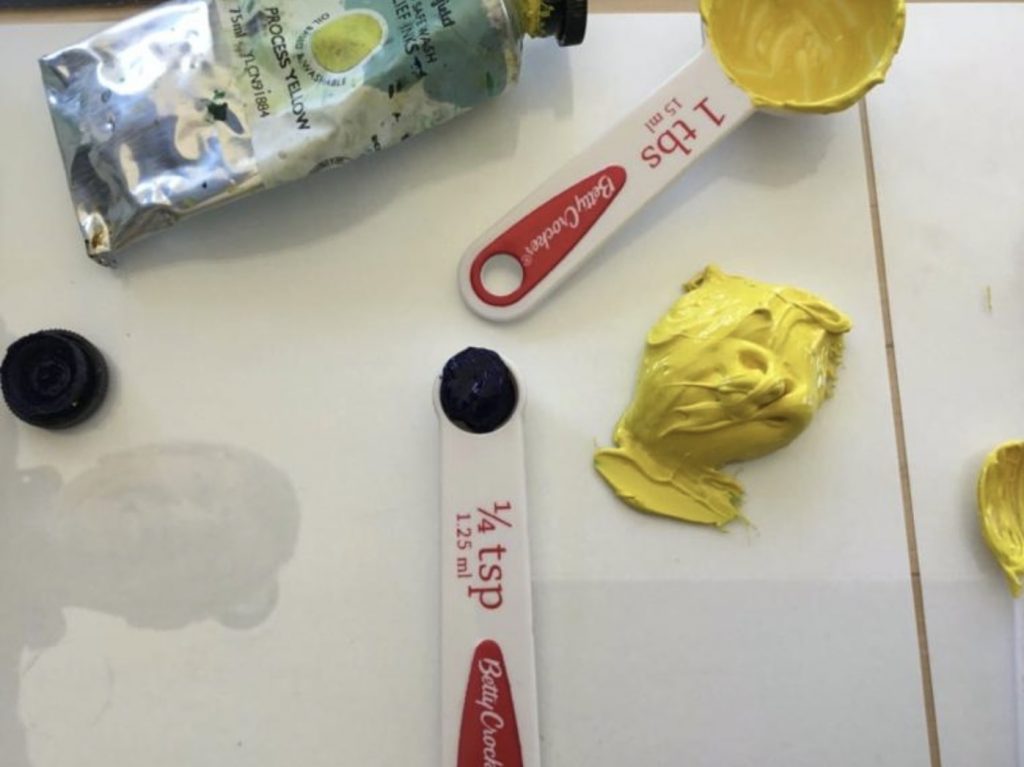
You will use a larger amount of process yellow and a much smaller amount of process blue. You want to achieve a middle to light green, not too light but certainly not too dark. It is much easier to darken a color later on than to try to light it. So decide what shade of green would be suitable. A good idea is to use a tube of permanent green from a reputable brand in oil paint and try to match it.
My recipe was the following: ( I doubled the recipe to fill the 37 ml tube). These proportions are approximate and may vary according to the brand of ink that you are using.
1 tablespoon of process yellow
1/8 teaspoon of process blue
Instructions:
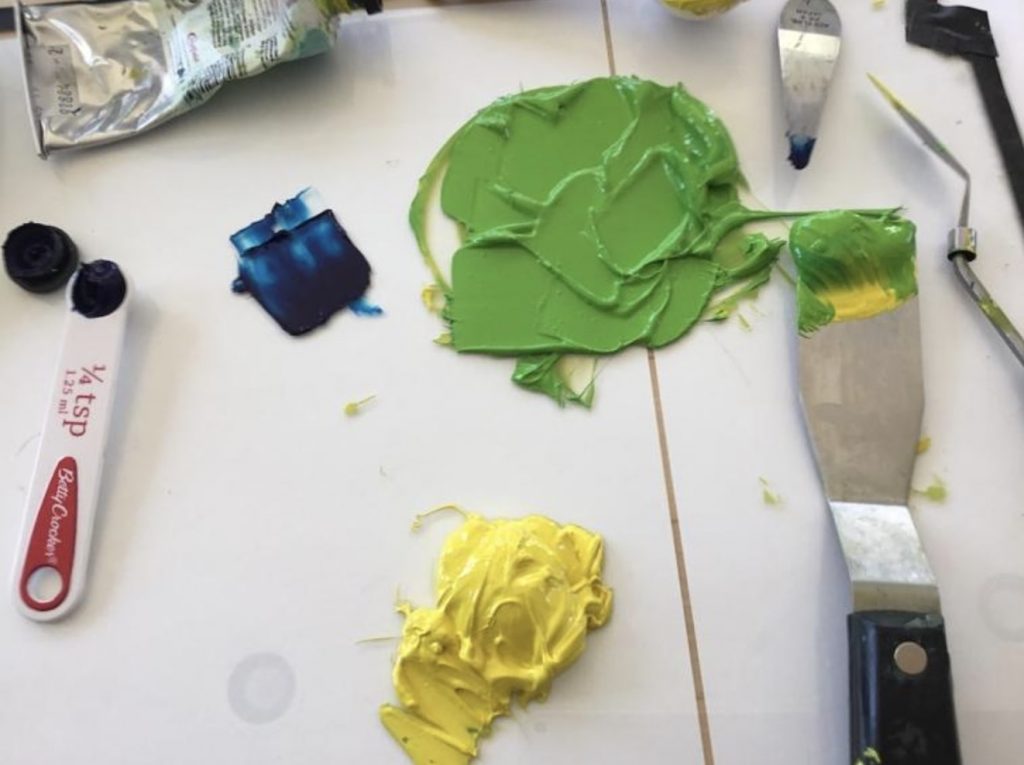
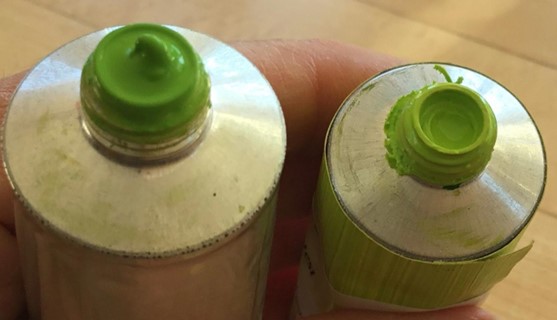
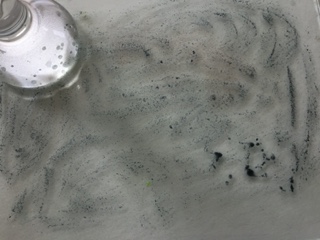
Spread the yellow on a glass plate (Fig. 2). Work the ink until it is soft. Start adding the process blue, slowly until you get the desired hue. Compare that with the permanent green light in oil paint. I used the Seymour Wallace Permanent green light fine oil purchased from Select Fine Arts on St Joseph Blvd in Orléans to get a match. If your green is too dark, as in Fig. 3, just add more yellow.
Fig. 2Fig. 3
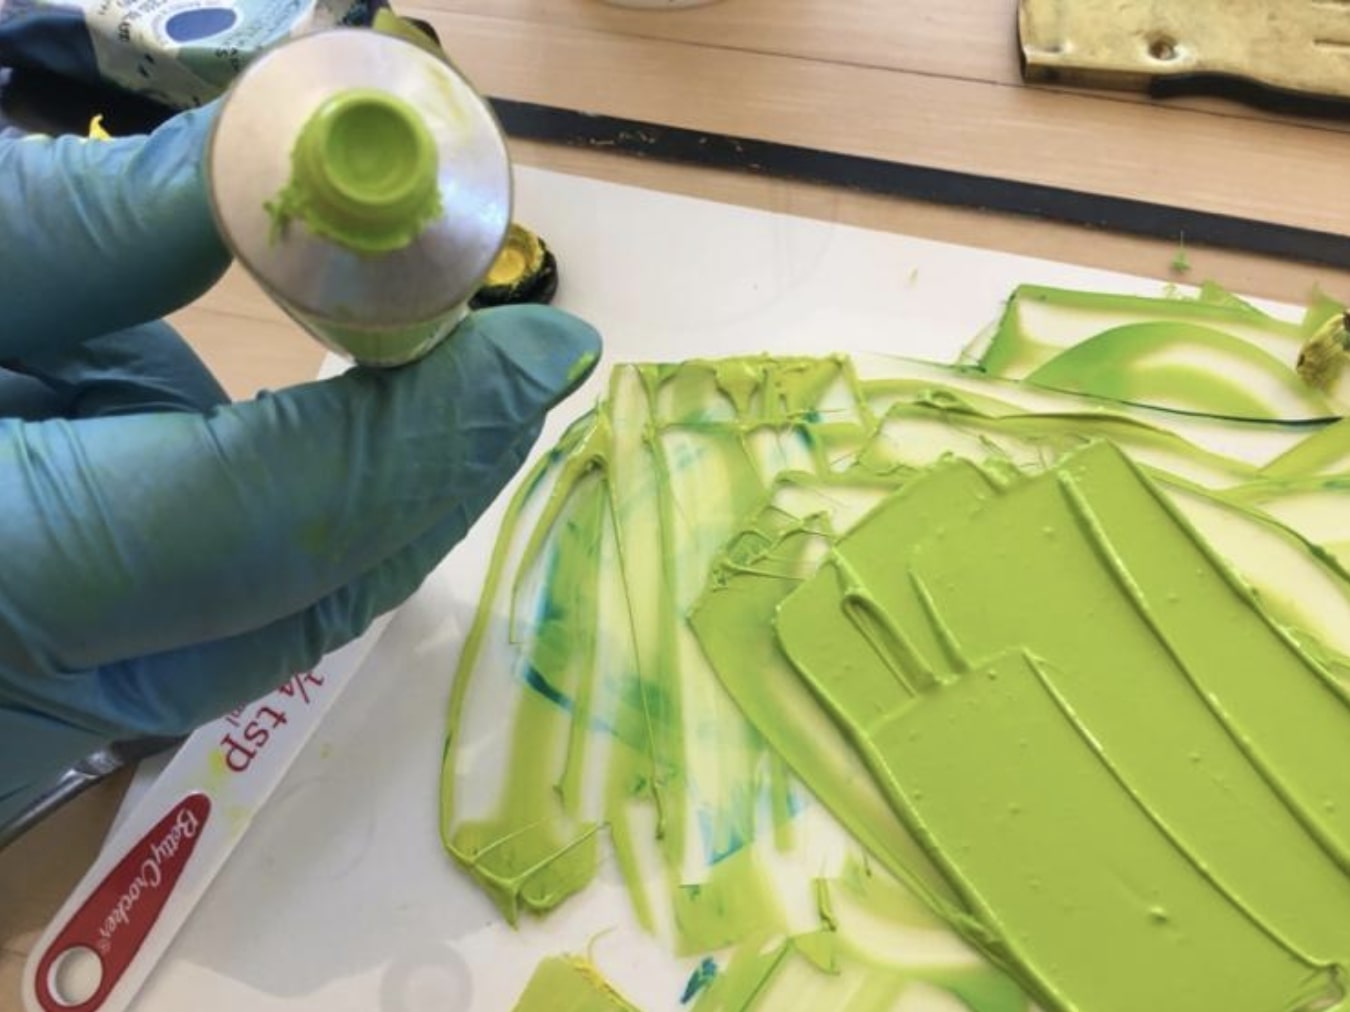
You may want to do only one recipe and fill only half the tube, depending on your needs. Start filling your empty tube using the hints from post Transferring Ink. Loosen the cap and tap down to get the ink flowing. Stop around 2/3 full and start pressing down on bottom end. Use pliers to pinch the ends together. Fold the ends twice.
Fig. 4Fig. 5
You will now have a nice tube of permanent green. (Fig. 4) When you want it lighter on your palette, it is then easy to add some yellow; if you want it darker, just add a touch of blue. Fig. 5 shows the home-made green and the Seymour Wallace Permanent green.
Why would you want to make your own ink? Here are a few reasons.
You are looking for a particular colour that is not available in your regular brand of ink.
You use large quantities of certain colours like black or white and it may be practical to make a few large tubes.
In times such as a lock-down in England, certain colours may be out of stock in Canada but pigments are always in stock at Kama Pigments in Montreal.
You are inquisitive about colour and oil absorbency and you like to experiment.
There are a few things to know before you start:
Pigment structure
The crystalline or chemical structure of a pigment will determine its particular shape, size and colour.
Because of their crystalline structure different pigments will absorb different amounts of oil.
As a result of these factors some pigments will require different amounts of oil and will take longer to mill than others.
Pigments are agglomerations of primary particles that can be separated into a dispersion using a muller and an oil binder. Some particles require more oil to completely wet and coat their surface while others require less oil. The quantity of oil necessary is mostly determined by the shape and size of the pigment particle. For example, the cadmium pigment is round and relatively smooth; the alizarin crimson has a more nodular grape-like structure and the ultramarine pigment is more spherical and uneven. Since the milling process calls for the complete coating of every particle, it follows that a particle which is round and smooth would require less oil than one with a nodular or uneven shape. This is what determines the oil-absorption rate. (See below). In the case of pigments, size does matter. The smaller the size of the particle, the larger the overall surface area that needs to be coated with oil in a given volume or weight.
Some may ask if the amount of oil in a given mixture determines the drying time. For example, the burnt umber pigment requires significantly more oil than the titanium pigment in the milling process. (Oil painters have a problem with burnt umber as it creates an issue with the fat over lean principal. This problem is created by the extra oil necessary in the production of this colour.) However, this is not an issue in the case of printing; there is no correlation between the amount of oil that a pigment requires and the drying time. In fact, it is often the opposite. We all know that burnt umber dries quickly while titanium dries slowly.
Oil-absorption-rate
The oil-absorption-rate is measured by the ratio of both pigment (by weight) to oil (by weight). As an aside, there is currently a debate as to whether the measure should be by weight or by volume, but that discussion is for another day. The standard unit of measure for the US is in ounces. For example the quinacridone magenta which we will be mulling would require 100 ounces in linseed oil (by weight) to grind 40-65 ounces of pigment (by weight) to form a stiff paste. The oil-absorption-rate indicates whether the paste contains more or less oil and how its oil content compares with that of other pigment pastes.
Tools (fig.1)
Dry pigment (in this case, Quinacridone Magenta PR122)
A glass muller
Thick plate glass (I use a 6mm thickness)
Linseed oil. I used the Caligo Safe Wash Oil.
Magnesium carbonate (MgCo2)
A wetting agent such as oxgall or isopropyl alcohol
Spatulas, one large, one small
37ml tube
Pliers
Tablespoon
Dropper
Figure 1
Recipe for Magenta PR122.
A good approximation to fill a 37ml tube would be 3 tablespoons of dry pigment.
Linseed oil (see ratio quoted above)
Approximately 1/16 to 1/8 teaspoon MgCo2 per tablespoon of dry pigment.
Note: It’s a good idea to mix one tablespoon of pigment at a time. Also, if the paste is too stiff it is because too much magnesium carbonate was added. You will notice this when comes the time to clean the tools as the paste will tend to stick to the tools. Then all you need to do is add a few drops of oil when comes the time to use the paste. It is easier to add oil to a stiff paste than to add the magnesium carbonate if the paste is too oily.
Preparation of muller and glass plate.
The glass muller comes with a rough flat bottom but needs to be made even rougher. Also, the glass plate needs to be sandedso that it is slightly pitted. The muller comes (if purchased from Kama Pigments) with an 80 grit silicon carbide. Spread this grit on the glass plate and add water. Take the muller and rub it against the grit on the glass plate. (It does make an awful noise). This will roughen both the muller and the glass and will create resistance as the pigment mixture is mulled against the glass. (Fig.2)
Figure 2
Figure 3
Instructions
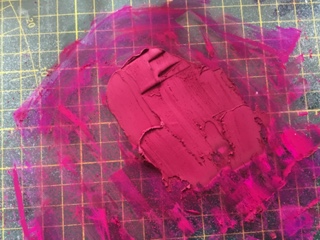
Measure the dry pigment on the glass plate (fig.3). With a dropper, start adding a wetting agent such as oxgall or alcohol to the dry pigment; using a small spatula work the mixture until all the pigments and wetting agent form a paste (fig.4). This step is important in order to break the surface tension of the pigment particles and to allow the particles to better absorb the oil.
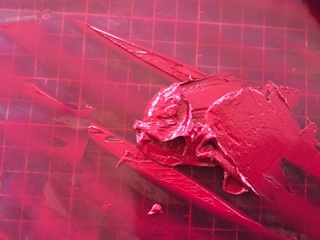
Slowly start adding the oil to the paste. I use a dropper for this. At this point, start using a large spatula and start working the mixture carefully blending the oil into the paste. The idea is to obtain a smooth paste. Continue adding oil until the mixture is easily spreadable but not too oily. (Fig. 5).
Figure 4
Figure 5
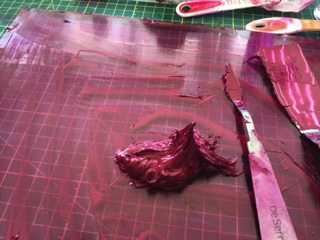
At this point, spread the mixture on the glass plate and start using the muller. Push the muller firmly on the glass plate using a circular movement in the shape of an 8 (fig. 6). Do this for approximately 20 minutes, adding oil if necessary. The bottom part of the muller will gather the mixture along its edges; using the small spatula, remove this paste and reintegrate it to the mixture on the plate. You also need to take the large spatula and frequently gather the mixture which has by now spread over the surface of the glass plate and reposition it in the middle of the plate. Start the process all over again until you feel that the mixture is nice and smooth with no visible dry pigment. The time necessary for a perfectly milled mixture is a function of the shape and size of the particle as explained above.
Figure 6
At this point you can set the muller aside after removing all paste underneath and along its edges. Now is the time to start adding the magnesium carbonate. The magnesium carbonate will make the ink sticky so you only need small quantities. Otherwise you will find that it is very difficult to wash off as it sticks to all the tools. You will be using a small spatula to mix the carbonate into the paste. Work it in well. You want a peak but not a stiff peak (fig.7). Your ink is now ready.
Figure 7
Start filling the tube with a small spatula. Hold the tube vertically, with the cap down and slightly unscrewed, As you fill the tube, you need to wrap your fingers around the tube and delicately make a downward movement, hitting a table with the bottom part of your hand so that the ink starts moving down the tube. Try not to tap down on the cap; you don’t want to damage it.
Never fill the tube to the end as you will need to leave some space to pinch the open ends together. Filling approximately 2/3 and a bit more should be about right. Pinch the open ends together using the pliers and fold the ends twice. You may want to put a piece of paper between the metal of the tube and the pliers to avoid damaging the metal.
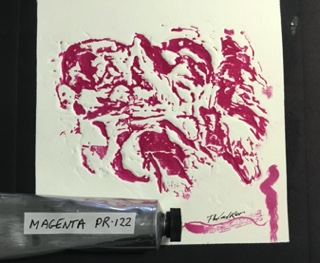
You now have a perfectly good tube of hand milled inkas used in the print (fig.8). The black border was a mixture of the magenta and phthalo green. The squiggles on the bottom right of the photo were made with the magenta heavily diluted with a plant-based diluent from Wallace Seymour which can be used to retouch a print.
Figure 8
Tools and pigment were purchased from Kama Pigments in Montreal.
The oil measurements were obtained from Ralph Mayer, The Artist’s Handbook of Materials and Techniques.