Annual General Meeting is being held on Jan 24th, 2021 via Zoom. If you want to join us but didn’t get the email invite, please contact us via ottawaprintmakers@gmail.ca. We will be looking back at what we accomplished in 2020 and discuss ideas for 2021! Hope to see you there!
Author: Tina
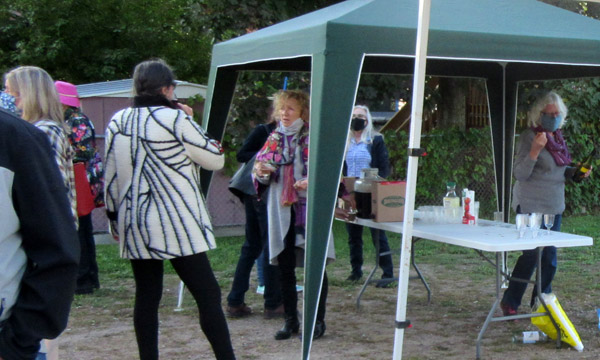
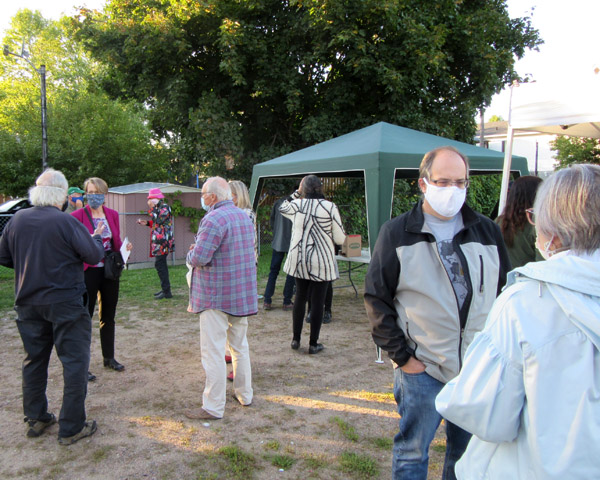
Printer’s Ink Vernissage
Everyone enjoyed the vernissage Friday night at the Stone School Gallery for Printer’s Ink: How many words make a picture?”. Visitors and artists were able to visit the exhibit in the upper gallery in small numbers with a very positive response. There were lots of great comments about the overall exhibit and individual pieces of artwork. The exhibit is getting coverage from the local newspaper. Emily, a journalist for the Equity newspaper came out to take pictures and interviewed the curator of the exhibit, Tina Petrovicz (OGPC member). The theme, the diversity of exhibit and the creative challenges of the project were discussed.
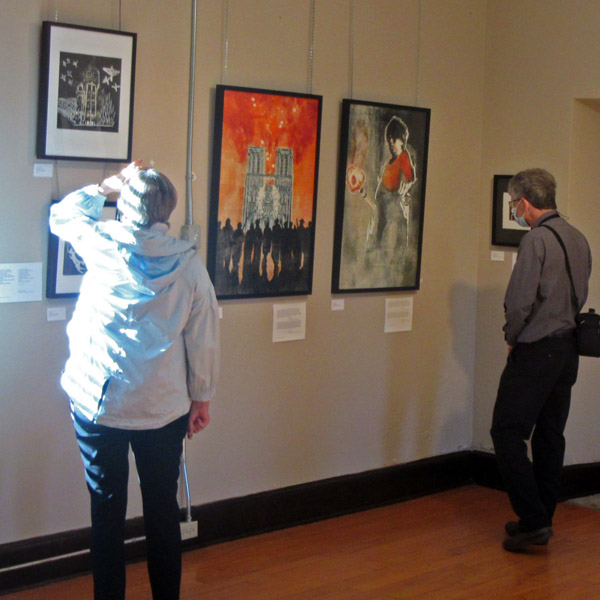
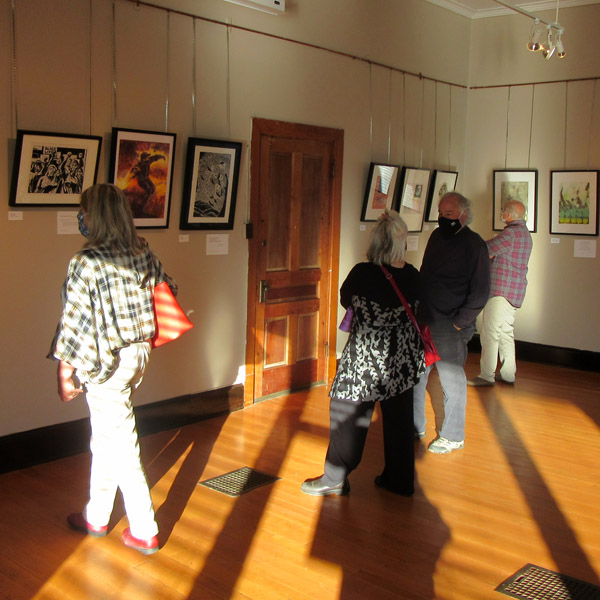
Refreshments were served in the yard of the gallery on this lovely evening. This allowed the guests and artists space to have a chat and enjoy a glass of wine and the great nibbles that were brought. It was wonderful and safe celebration of months of this group effort and that the exhibit happened inspite of the challenges that COVID has created for us as artists.
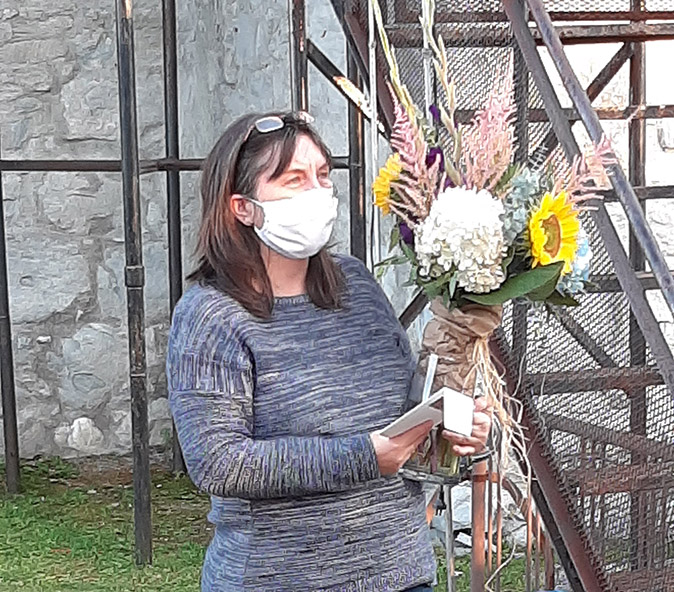
OGPC members of the exhibit, surprised Tina with flowers and a card as a thank you for her efforts in organizing this project and the resulting exhibit. She was honored to have worked with such a great group of artists, everyone pitching in to make it happen and the trully wonderful artwork that was created.
LA SÉRIGRAPHIE
par Louise Lépine
This part 1 of 2 parts. Volet 1 de 2 : les étapes.
Lorsque je vais aux expositions de l’OGPC je constate que bien peu d’entre nous ne s’adonnent à l’art de la sérigraphie. Est-ce parce que l’on pense que la sérigraphie ne sert qu’à imprimer des T-shirts ? Ou est-ce tout simplement parce que l’on ne s’est pas arrêté à connaître cette technique ?
L’article qui suit vous donnera une définition des étapes qui mènent à la création d’une sérigraphie. Cet article sera suivi, le mois prochain, par un survol de chacune de ces étapes ainsi qu’une liste des outils vous permettant de vous équiper et de monter votre studio.
QU’EST-CE QUE LA SÉRIGRAPHIE? C’est « une technique d’impression par laquelle on applique une mince couche d’encre, selon un motif défini, sur une feuille de papier ou tout autre support placé en dessous d’un écran. La raclette presse alors l’encre qui traverse les ouvertures de la trame du tissu tendu de l’écran. Le motif est délimité par le clichage qui consiste à boucher la trame du tissu là ou l’encre ne doit pas traverser. »
LE CLICHAGE : Plusieurs techniques peuvent ici être utilisées afin d’obstruer les parties de l’écran qui ne doivent pas être imprimées : papier-pochoir, film de découpe, liquide de remplissage etc. Personnellement je favorise le procédé photographique. « Le bouche-pores utilisé est une émulsion sensible à la lumière qui a la propriété de durcir lorsqu’elle est exposée à la lumière, devenant ainsi insoluble à l’eau. On délimite le motif à imprimer par exposition de la couche d’émulsion qui est mise en contact avec une feuille d’acétate transparente sur laquelle le dessin a été opacifié. Ces zones opaques empêchent les rayons ultra-violets d’atteindre l’émulsion qui se dissoudra à l’eau alors quel les zones exposées se durciront et deviendront l’élément qui bouchera le tissu pour empêcher le passage de l’encre. »
LES ENCRES : « les encres et peintures sérigraphiques sont préparées à partir de pigments dont la granulation varie entre 5 et 10 microns. Les tissus les plus fins … représentent une ouverture de mailles de 25 microns : ce qui revient à dire que les encres passent facilement à travers les mailles…on ne peut employer n’importe quelle sorte de peinture en sérigraphie. »
L’opacité ou la transparence des couleurs ainsi que la juxtaposition et la superposition des plans de couleurs sont déterminées par les effets de profondeurs de légèreté etc. désirés.
L’IMPRESSION : L’écran est fixé par des charnières sur la base d’impression (une table). Le support est placé sous l’écran. L’encre est déposée sur le haut de l’écran. À l’aide d’une raclette l’encre est distribuée sur la surface de l’écran.
REPÉRAGE : Il est essentiel de développer un système de guidage qui permettra de déposer le support (papier) au même endroit pour qu’il y ait « une parfaite similitude des impressions du tirage. Pour cela on pose des guides ou taquets contre lesquels le papier vient buter quand on le place pour l’impression. »
RÉCUPÉRATION DE L’ÉCRAN : Il faut nettoyer rapidement l’écran afin que l’encre ne sèche pas et n’obstrue pas les mailles de l’écran. On enlève d’abord le surplus d’encre qui se trouve sur l’écran au moyen d’une spatule. Ensuite à l’aide d’un solvant on dissout les films et autres produits utilisés pour boucher les pores. L’écran est finalement nettoyé à l’eau et mis à sécher pour une utilisation ultérieure.
Traduction:
Raclette: squeegee
Clichage: blocking out
Ecran: screen frame
Trame: screen mesh
Encres: ink
Pochoir: stencil
Impression: pressing the ink against the mesh into the paper
Récupération: cleaning the screen.
Serigraphy (Part 2)
This is the second part of a two-part article on silkscreen printmaking by Louise Lépine.
Vous trouverez ici un survol de l’équipement nécessaire à la réalisation de sérigraphies. La description de l’usage de cet équipement, bien que non exhaustive, vous donnera un aperçu de leur utilisation. J’ajoute des commentaires sur mon expérience et mes préférences pour certains matériaux ainsi que la mention de quelques commerces où je m’approvisionne. En fin de texte vous trouverez en Annexe 1 un tableau qui contient les photos qui illustrent plusieurs des éléments dont je discute dans le texte. L’Annexe 2 est né plus tard quand on m’a demandé des précisions sur ma table de sérigraphie construite pour mes besoins.
Vous remarquerez que je favorise les commerces canadiens et que j’évite les multinationales. Il va sans dire que l’artisan[1] néophyte est encouragé à suivre un cours qui le guidera dans son apprentissage. D’excellents cours sont donnés à l’École d’art d’Ottawa.
Le cadre (aussi appelé l’écran) sur lequel la trame est tendue peut être de bois ou de métal.
Bien que le cadre de bois puisse être fabriqué à peu de coût par un artisan et qu’on le retrouve facilement dans le commerce, on a constaté à l’usage que ces cadres se déforment et que de ce fait la trame se détend. Mieux vaut donc s’équiper de cadre en métal : ils sont légers et durables et la trame demeure bien tendue.
La dimension d’un cadre est déterminée à partir de
l’intérieur du cadre. On doit prendre en
considération la dimension de l’image
à imprimer et ajouter un espace additionnel au périmètre, qui permettra de déposer la raclette
et le surplus d’encre. Il faut aussi prendre en considération la grandeur de
l’évier dont on dispose pour le dépouillement de l’écran.
J’achète mes cadres et les fais réparer au besoin dans ce commerce torontois https://www.gsdye.com/screen-equipment.html. À noter que les cadres pour imprimer sur le tissu ont une trame moins fine que ceux qu’on utilise pour imprimer sur du papier. On utilise généralement des cadres No 110 pour le tissu et No 230 pour le papier.
Le clichage – Bien que l’on puisse utiliser un pochoir, des liquides de remplissage comme les bouche-pores etc… la technique que j’ai apprise à l’Université, l’émulsion photosensible, demeure ma préférée. J’ai longtemps utilisé les produits de marque « Speedball » constitués de photo émulsion et d’un sensibilisateur communément appelé Diazo. Ces deux composantes, lorsque mélangées, doivent être utilisées dans les trois mois. Présentement j’utilise un produit mélangé à l’usine et que je peux conserver un an. Le site : http://metrographicsupplies.com/ vous informera sur les variantes de ce produit et le personnel du service à la clientèle pourra vous guider judicieusement.
L’émulsion photographique est appliquée sur l’écran avec l’instrument qui tient de la raclette et d’un récipient, le « scoop coater ». Puis on laisse sécher l’écran à la noirceur. J’ai acheté mon « scoop coater » en même temps que mes écrans et ma raclette : https://www.gsdye.com/screen-equipment.html
L’image à imprimer– L’image peut être un dessin ou même une photo[2]. Elle doit être transférée sur un acétate. Pour éviter des frais, on peut imprimer l’image à partir d’une photocopieuse. Il suffit de mettre quelques gouttes d’huile sur le papier imprimé et voilà!
Peu importe, acétate ou papier, il est essentiel que cette image soit d’un noir profond.
L’exposition à la luminière – L’artisan peut obtenir de très bons résultats à partir d’un équipement rudimentaire : une source lumineuse, une vitre sur laquelle on dépose l’image, l’écran photosensible, une planche qui recouvre l’écran et un poids pour assurer un bon contact. Le temps d’exposition à la lumière dépend de la lampe utilisée. J’expose mon image sur une table conçue par mon mari (voir photos en Annexes 1 et 2). Libre à vous d’en construire une semblable.
Dans son livre, L’art de la sérigraphie, Louis Desaulniers[3] illustre bien les composantes d’un tel appareil (CF annexe).
Les encres – Il est facile de composer ses propres couleurs : le rouge, jaune, bleu, noir et blanc suffisent amplement. Ici encore les produits « Speedball » se retrouvent sur toutes les étagères. En plus des couleurs, il est utile de s’équiper de produits qui donnent de la transparence à nos encres[4], ou encore d’en augmenter le volume lorsque nous constatons qu’il nous reste peu d’encre pour terminer une impression.
Mais, si on veut des couleurs hors de l’ordinaire, je vous recommande d’utiliser celles de « Wallace Seymour». En y ajoutant du « Screenprinting Paste », ces encres s’adaptent parfaitement à la sérigraphie. Vous les retrouverez exclusivement chez le commerce Select Fine Arts Materials à Orléans. https://selectfineartmaterials.com/
L’impression – Il est primordial que le cadre soit stable. Pour ce faire il suffit de le fixer à une table au moyen de charnières à sérigraphie. https://www.gsdye.com/screen-equipment.html
L’encre est distribuée sur la surface de l’écran au moyen d’une raclette : https://www.gsdye.com/screen-equipment.html
Le support/le papier doit être lisse et absorbant. Le papier BFK Rives est largement utilisé pour la sérigraphie. Il est important de le prendre suffisamment épais (250g/m²) afin de faciliter la manipulation.
Récemment j’ai utilisé un papier fait au Canada à la Papeterie St-Armand de Montréal. Là encore on le retrouve chez Select Fine Arts Materials.
Le repérage – Assurez-vous, à l’aide d’onglets, que le papier reste dans la même position à chaque succession d’impressions des pochoirs et/ou d’images transférées sur acétate.
Le dépouillement de l’écran – Il est primordial de ne pas laisser sécher l’encre sur l’écran. Donc, dès que vous avez terminé d’encrer votre dernière épreuve, passez l’écran sous l’eau jusqu’à ce que les mailles correspondants à l’image à imprimer soient ajourées. Sécher ensuite l’écran. Vous pourrez alors imprimer l’image à nouveau.
La récupération de l’écran – Immédiatement après avoir encré, il faut enlever le surplus d’encre puis enlever l’émulsion photographique à l’aide d’un produit spécialement conçu à cet effet. Passer ensuite l’écran sous l’eau. http://www.thescreenprintstore.ca/categories/Screen-Reclaimers/
Il est recommandé d’utiliser un jet d’eau puissant afin
d’éliminer tout trace d’encre et d’émulsion.
Il est facile de respecter cette directive lorsque l’on a un atelier
muni d’un grand évier ou encore lorsque l’on peut effectuer cette opération à
l’extérieur. En été, j’utilise mon
nettoyeur à haute pression mais, en hiver, avec de bons produits et un pommeau
à douche qui offre une bonne pression, dans un évier assez grand pour recevoir
le cadre employé, j’arrive aisément à récupérer mes écrans.
[1] Dans le présent document, les termes employés pour désigner des personnes sont pris au sens générique; ils ont à la fois valeur d’un féminin et d’un masculin. [2] L’œuvre « Bons baisers d’Australie », en Annexe 1, a été réalisée à partir d’une photo. De plus, on remarquera ici la technique du chine-collé. [3] Louis Desaulniers, L’art de la sérigraphie, 1976, Les Presses de l’Université du Québec, p.133. ISBN 0-7770-0170-5 [4] J’ai abondamment utilisé la transparence dans mes premières sérigraphies comme en témoigne « Au-dessus de l’étang » mis en Annexe 1.
Matting and Paper Conservation
by Francine Walker
We were very fortunate and delighted to have Heather McLeod give a presentation on archival matting at our AGM in December. Heather is a professional framer at the National Gallery of Canada; she is also a member of OGPC.
Heather covered a number of aspects on the subject, including a demonstration of how to prepare a mat package with archival products, i.e. how to hinge the mat window to the matboard as well as how to properly secure the artwork to the matboard. She demonstrated the T-hinge, the V-hinge and the pocket method and discussed the importance of using archival quality tape and gummed paper. The products are the following: gummed paper hinging tape and Hayaku or Mulberry hinging paper, both by Lineco as well as Neschen Filmoplast P90.
The hinging tape is thicker and is used to tape the window mat to the backing, usually matboard, in the form of a V. The hinging paper or hinging tissue is thinner and is used to tape the artwork to the matboard. Both are pH neutral and therefore safe for archival and long-term conservation. Another option is to make a pocket or corner piece using archival paper or Japanese paper made from 100% koso fibers and taping it to the matboard. Japanese paper is often used by conservators to make paper hinges. (See articles below for instructions.)

A question was asked on how to prepare a frame when a mat is not required such as for a more contemporary look (also called bleed mounting). Here are 3 possibilities:
- A thin piece of acid-free foam core to fit the rabbet of the frame. This involves cutting and applying glue to either the frame or the foam core, unless the foam core is self-adhesive.
- An acrylic spacer or separator. Spacers are available in black, white or clear. These have the advantage of being inert, therefore archival. They frequently come with an adhesive. The disadvantage is in the cutting. A saw is needed and perhaps a good clamp. However, the look is clean and would not flatten over time. The cost is also a factor. They range from $5-6 at Deserres to $18 at a frame shop. They usually come in 5 ft lengths. Canus Plastics sells a clear spacer in 6 ft lengths for $3.
- Ragboard strips laminated together with archival paste can be attached to the glazing.
To prevent wood lignin and acids from the side of the wood frame migrating to the artwork, it was suggested lining the inside of the frame with metallic tape (the type used to seal a furnace).
This leads us to consider the different types of matboards and the nature of the papers that make up the matboards, i.e. the surface papers, (face and backing) and the core of the matboard.
The following discussion is put together from various online sources and any error of interpretation is entirely mine. However, the URLs referenced below are sourced from recognized expert advice and make for fascinating reading.
What is the difference between Museum, Conservation, White Core and regular mat board?
Essentially, Museum quality matboard has the most exacting standards and would be used for rare and valuable art works. It is made entirely from cotton fibers.
All others, including Conservation, White Core and other regular matboards are made from wood pulp. The wood pulp contains cellulose, lignin & other acids. The lignin and acids would contaminate the paper if they were not removed.
The permanence of the paper/matboard comes from the strength of the fiber and the purity of the cellulose that composes it.
Cotton pulp is mostly cellulose with minute quantities of lignin and is the purest for long-term preservation. For Museum quality, all surfaces of the matboard i.e. the face, back and core papers involved in the lamination process have to be from cotton cellulose.
For matboards made from wood pulp, it is the percentage of cellulosic material present in all surfaces of the lamination that determines whether a matboard can be considered for longer-term conservation. Conservation matboard would have close to 98% cellulose and the lignin content would be no more than 0.65% after processing. This is called “high alpha-cellulose” (some paper makers such as St. Cuthbert’s Mill consider 94% cellulose as conservation quality.) The lignin and other acids such as Sulphur, Iron and Copper present in the wood pulp would have been extracted by mechanical means. The process of de-acidification is done by adding calcium or magnesium bicarbonates to neutralize the acids and bring the pH level of the pulp to 7 or higher. An additional bicarbonate reserve is added to act as a buffer on the paper so that acids which could migrate over the years would be neutralized by the bicarbonates. Over time, (a few decades and up to 100 years) it is possible that the reserve of carbonates would no longer be able to neutralize the acids, and the paper could suffer yellowing and possibly some deterioration. These are considered archival.
pH neutrality is truly applicable to aqueous solutions where it is possible to control the balance between hydrogen ions. In other mediums such as paper, especially wood-pulp based paper, other ions are present such that adjusting the pH level is a matter of introducing counterbalancing agents such as bicarbonates to make the solution more alkaline. The term acid free is often used incorrectly as a synonym for lignin-free.
All Museum quality is archival but not all archival is museum quality. For example, Conservation matboard is considered archival because of its high alpha-cellulose content. But it would not be Museum quality.
The term “archival” is nontechnical and can be misleading, broadly suggesting that a material is permanent or chemically stable. The term is not quantifiable as no standards exist that describe the exact qualities of an “archival” material. This definition is from the PPFA, the Professional Picture Framers Association.
Today, most regular matboards have some basic treatment to neutralize against the excessive acidity that is released when lignin, the binding polymer in wood, breaks down. But regular matboards should not be used to frame serious artworks.
Environmental conditions, such as humidity, light exposure, lightfastness of colored matboard, sizing, pollutants, as well as inappropriate framing techniques could cause deterioration of the artwork over time. Of course, the chemicals present in the ink as well as poor quality printing paper could also affect the artwork.
The major matboard company in Canada is Peterboro Matboards. They have 3 classifications for their matboards.
- Museum grade: 100% cotton fibers.
- Conservation quality: high alpha-cellulose (98%); made from wood pulp.
- White Core quality: slightly lower alpha-cellulose, made from wood pulp. The surface and backing are acid free, while the core would not be acid-free and would contain optical brighteners to prevent discoloration. White Core grade matboard is not suitable for preservation matting.
Peterboro also makes a 2-ply 100% cotton board, which can be used for various mounting purposes such as an interleaf. It is available at DeSerres in a 16”X20” sheet.
As a complement to Heather McLeod’s presentation at the AGM, here are 5 references for those who were unable to attend the AGM. You will find demonstrations of the various methods of hinging as well as technical information on paper classification. The articles by Hugh Phibbs are particularly interesting. Mr. Phibbs was Coordinator of the Preservation Services, Conservation Division of the National Gallery of Art, Washington, DC.
- Library of Congress, Matting and Hinging of Works of Art on Paper [PDF: 2 MB / 32 pp.]. Compiled and illustrated by the Library of Congress Conservation Division.
- Northeast Document Conservation Center, Matting and Framing for Art and Artifacts on Paper
- Hugh Phibbs, “Preservation Matting for Works of Art on Paper” [PDF: 307 KB / 24 pp.]
- Recent Developments in Preservation of Works on Paper by Hugh Phibbs, https://cool.conservation-us.org/coolaic/sg/bpg/annual/v24/bp24-10.pdf
- The determination of the alpha-cellulose content and copper number of paper. https://nvlpubs.nist.gov/nistpubs/jres/6/jresv6n4p603_A2b.pdf
Watermark* by Carol Howard Donati
Watermark* November 11 – 16
Gallery 115, Visual Arts, University of Ottawa, 100 Laurier Ave
Reception: Tuesday, November 12, 6 – 9 PM (use Cumberland Street entrance)
You are invited to reach up and add an impression of your hand-print to a cumulative community mural on the gallery walls.
Using paints provided, add colour to your hand then reach as high as you can on the wall and make your mark! Hand painting station provided.
Statement:
Over the last few years I have been documenting the unusual height of spring flooding on the Ottawa River near where I live, including evidence of the high-water mark left across local vegetation as the waters recede. With Watermark I invite others to share my new awareness of extreme weather conditions and join with me in creating a mural of handprints around the gallery wall at approximately the two meter mark. Two meters is the average height above normal that the Ottawa River reached at its peak in my area this spring. Recreating this mark by reaching up the wall allows us to physically register our presence within the height of local flooding while at the same time signaling through our cumulate show of hands the potential of our collective agency in the face of environmental crisis.
Wa-ter-mark (def)
- The line marking the level reached by a body of water
- A distinguishing symbol that identifies identity, genuineness, value
Where do we fit as individuals in the climate change crisis?
How are we impacted?
How can we make a mark against the flood of extreme effects impacting our planet today?
You are invited to reach up and add an impression of your hand-print to a cumulative community mural on the gallery walls.
Using paints provided, add colour to your hand then reach as high as you can on the wall and make your mark! Hand painting station provided.
*We acknowledge that this event is taking place on land that is part of the unceded and unsurrendered Traditional Territory of the Algonquin people. We honour the Algonquin people and elders whose ancestors have occupied this territory since time immemorial and whose culture has nurtured and continue to nurture this land and its people.
Surroundings:Perceptions and Impressions
OGPC member Tina Petrovicz is presenting an exhibit of intaglio prints and animated devices at the Trinity Gallery Salon A . Everyone is welcome to the Vernissage Sunday Oct 27 1-3 PM. The exhibit runs from Oct 24th to Nov 26th.
Works on Paper at the Stone School
Many members of the OGPC including Tina Petrovicz, Murray Dineen, Valerie Bridgeman and Freida Hjartson are participating in an exhibition featuring original 5″x 7″ artwork from the 2019 PAA “Works on Paper Exhibition and Exchange”. One piece from the exchange is being exhibited and sold unframed as a fundraiser for Pontiac Artist Association. The vernissage is on July 26 6- 8 PM. The show runs until Aug 18th at the Stone School Gallery in Portage-du-fort, Quebec.
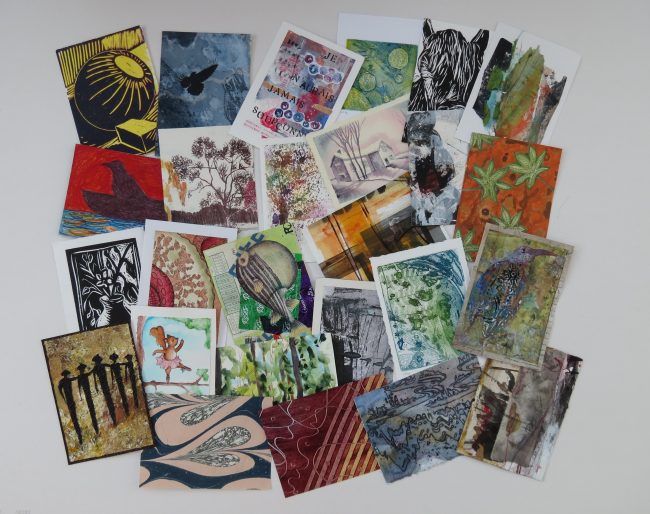
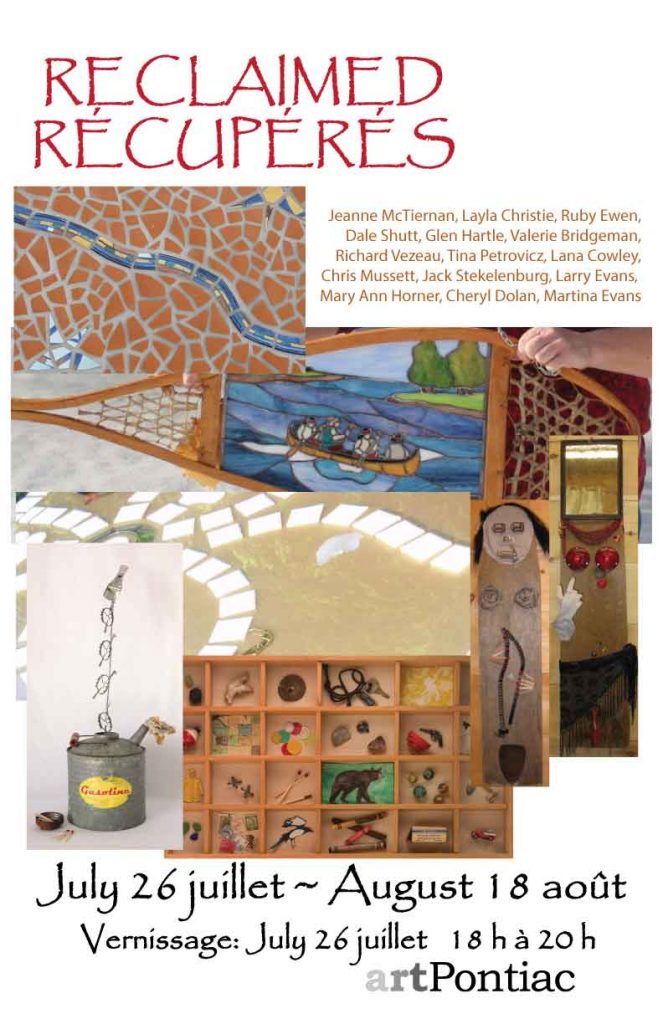
Reclaimed – Recycled materials
OGPC members Valerie Bridgeman and Tina Petrovicz are participating in a a group exhibit which challenged participants to create artworks from recycled materials. The show includes functional and decorative pieces, all of which underscore the imagination and creative spirit of our members.
“Reclaimed”
Vernissage July 26 6-8PM
Stone School Gallery, Portage-du-Fort, Quebec
Runs until Aug 18th
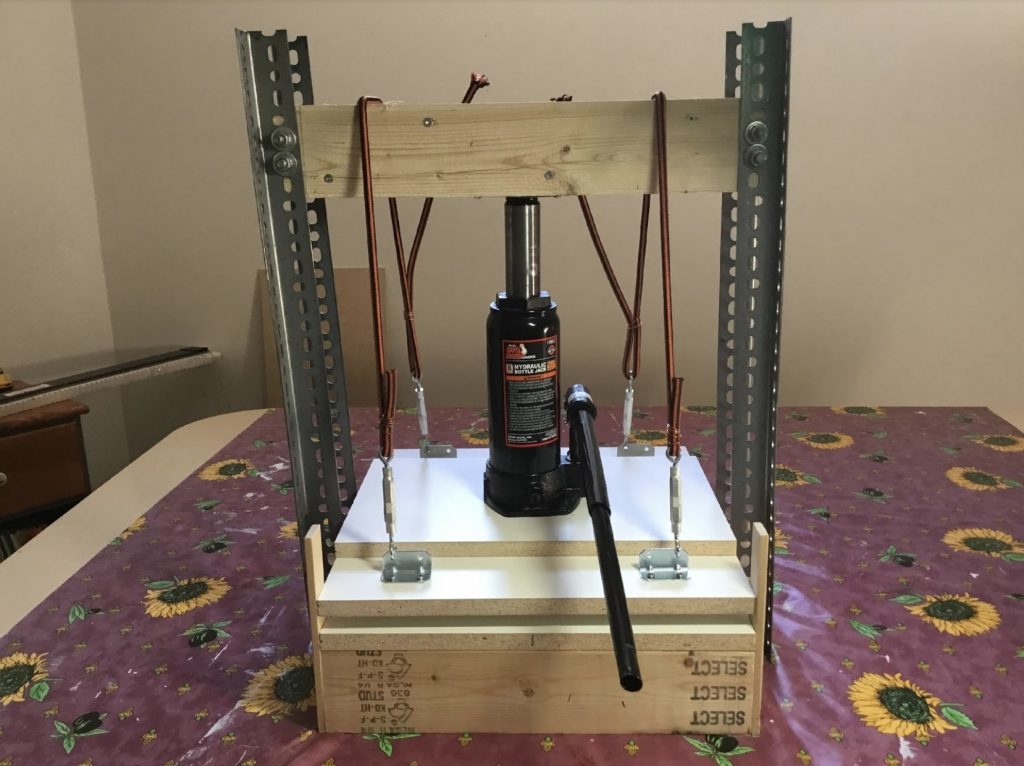
MAKING A BOTTLE JACK PRESS
by Francine Walker
Since I was new to printmaking and didn’t know whether I would continue to seriously pursue my skills, I thought it best to make a press rather than investing in an expensive one. As it turns out, it was a good investment of less than two hundred dollars. It works well, is solid and easily transportable.
I went for a 15” wide platen which seemed an ideal width to allow slightly larger prints. If I use a wide paper, I find it’s a good idea to roll the side edges from the back of the paper to ensure good coverage of the sides. The length is irrelevant as I can move the register front and back and simply come down with the bottle jack a few times. Below is a photo of the finished product. Here is the link to a web site article (no press no problem) which gives all the dimensions and materials needed. All the materials which were used are available in Ottawa. The metal posts are available at Canadian Tire, Home Depot and Lowes.